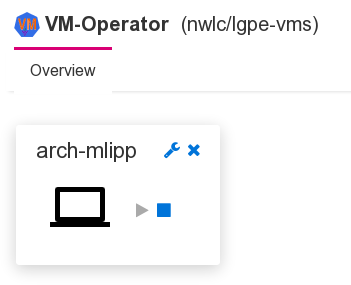
User view
Since 3.0.0
The idea of the user view is to provide an intuitive widget that allows the users to access their own VMs and to optionally start and stop them.

The configuration options resulting from this seemingly simple requirement are unexpectedly complex.
Control access to VMs
First of all, we have to define which VMs a user can access. This
is done using the optional property spec.permissions of the
VM definition (CRD).
spec:
  permissions:
  - role: admin
    may:
    - "*"
  - user: test
    may:
    - start
    - stop
    - accessConsole
Permissions can be granted to individual users or to roles. There is a permission for each possible action. “*” grants them all.
Simple usage vs. expert usage
Next, there are two ways to create the VM widgets (preview conlets in the framework’s terms). They can be created on demand or automatically for each VM that a logged in user has permission to access. The former is the preferred way for an administrator who has access to all VMs and needs to open a particular VM’s console for trouble shooting only. The latter is the preferred way for a regular user who has access to a limited number of VMs. In this case, creating the widgets automatically has the additional benefit that regular users don’t need to know how to create and configure the widgets using the menu and the properties dialog.
Automatic synchronization of widgets and accessible VMs is controlled
by the property syncPreviewsFor of the VM viewer. It’s an array with
objects that either specify a role or a user.
"/Manager":
  # This configures the GUI
  "/GuiHttpServer":
    "/ConsoleWeblet":
      "/WebConsole":
        "/ComponentCollector":
          "/VmAccess":
            syncPreviewsFor:
            - role: user
            - user: test
            displayResource:
              preferredIpVersion: ipv4
Console access
Access to the VM’s console is implemented by generating a connection file for virt-viewer when the user clicks on the console icon. If automatic open is enabled for this kind of files in the browser, the console opens without further user action.
The file contains all required and optional information to start the remote viewer.
- The “host” is by default the IP address of the node that the VM’s pod is running on (remember that the runner uses host networking).
- The “port” is simply taken from the VM definition.
In more complex scenarios, an administrator may have set up a load
balancer that hides the worker node’s IP addresses or the worker
nodes use an internal network and can only be accessed through a
proxy. For both cases, the values to include in the connection file
can be specified as properties of spec.vm.display.spice in the
VM definition.
spec:
  vm:
    display:
      spice:
        port: 5930
        server: 192.168.19.32
        proxyUrl: http://vms-spice.some.host:1234
        generateSecret: true
The value of server is used as value for key “host” in the
connection file, thus overriding the default value. The
value of proxyUrl is used as value for key “proxy”.
Securing access
As described previously, access to a VM’s display can be secured with a password. If a secret with a password exists for a VM, the password is included in the connection file.
While this approach is very convenient for the user, it is not
secure, because this leaves the password as plain text in a file on
the user’s computer (the downloaded connection file). To work around
this, the display secret is updated with a random password with
limited validity, unless the display secret defines a password-expiry
in the future or with value “never” or doesn’t define a
password-expiry at all.
The automatically generated password is the base64 encoded value of 16 (strong) random bytes (128 random bits). It is valid for 10 seconds only. This may be challenging on a slower computer or if users may not enable automatic open for connection files in the browser. The validity can therefore be adjusted in the configuration.1
"/Manager":
  "/Controller":
    "/Reconciler":
      "/DisplaySecretReconciler":
        # Validity of generated password in seconds
        passwordValidity: 10
/Manager/Controller/DisplaySecretMonitor.
Taking into account that the controller generates a display secret automatically by default, this approach to securing console access should be sufficient in all cases. (Any feedback if something has been missed is appreciated.)
-
Before version 4.0, the path for
passwordValiditywas ↩
